Easter Egg Ideas: Decorating with Temporary Tattoos
Nothing celebrates the spring season more than decorating easter eggs!
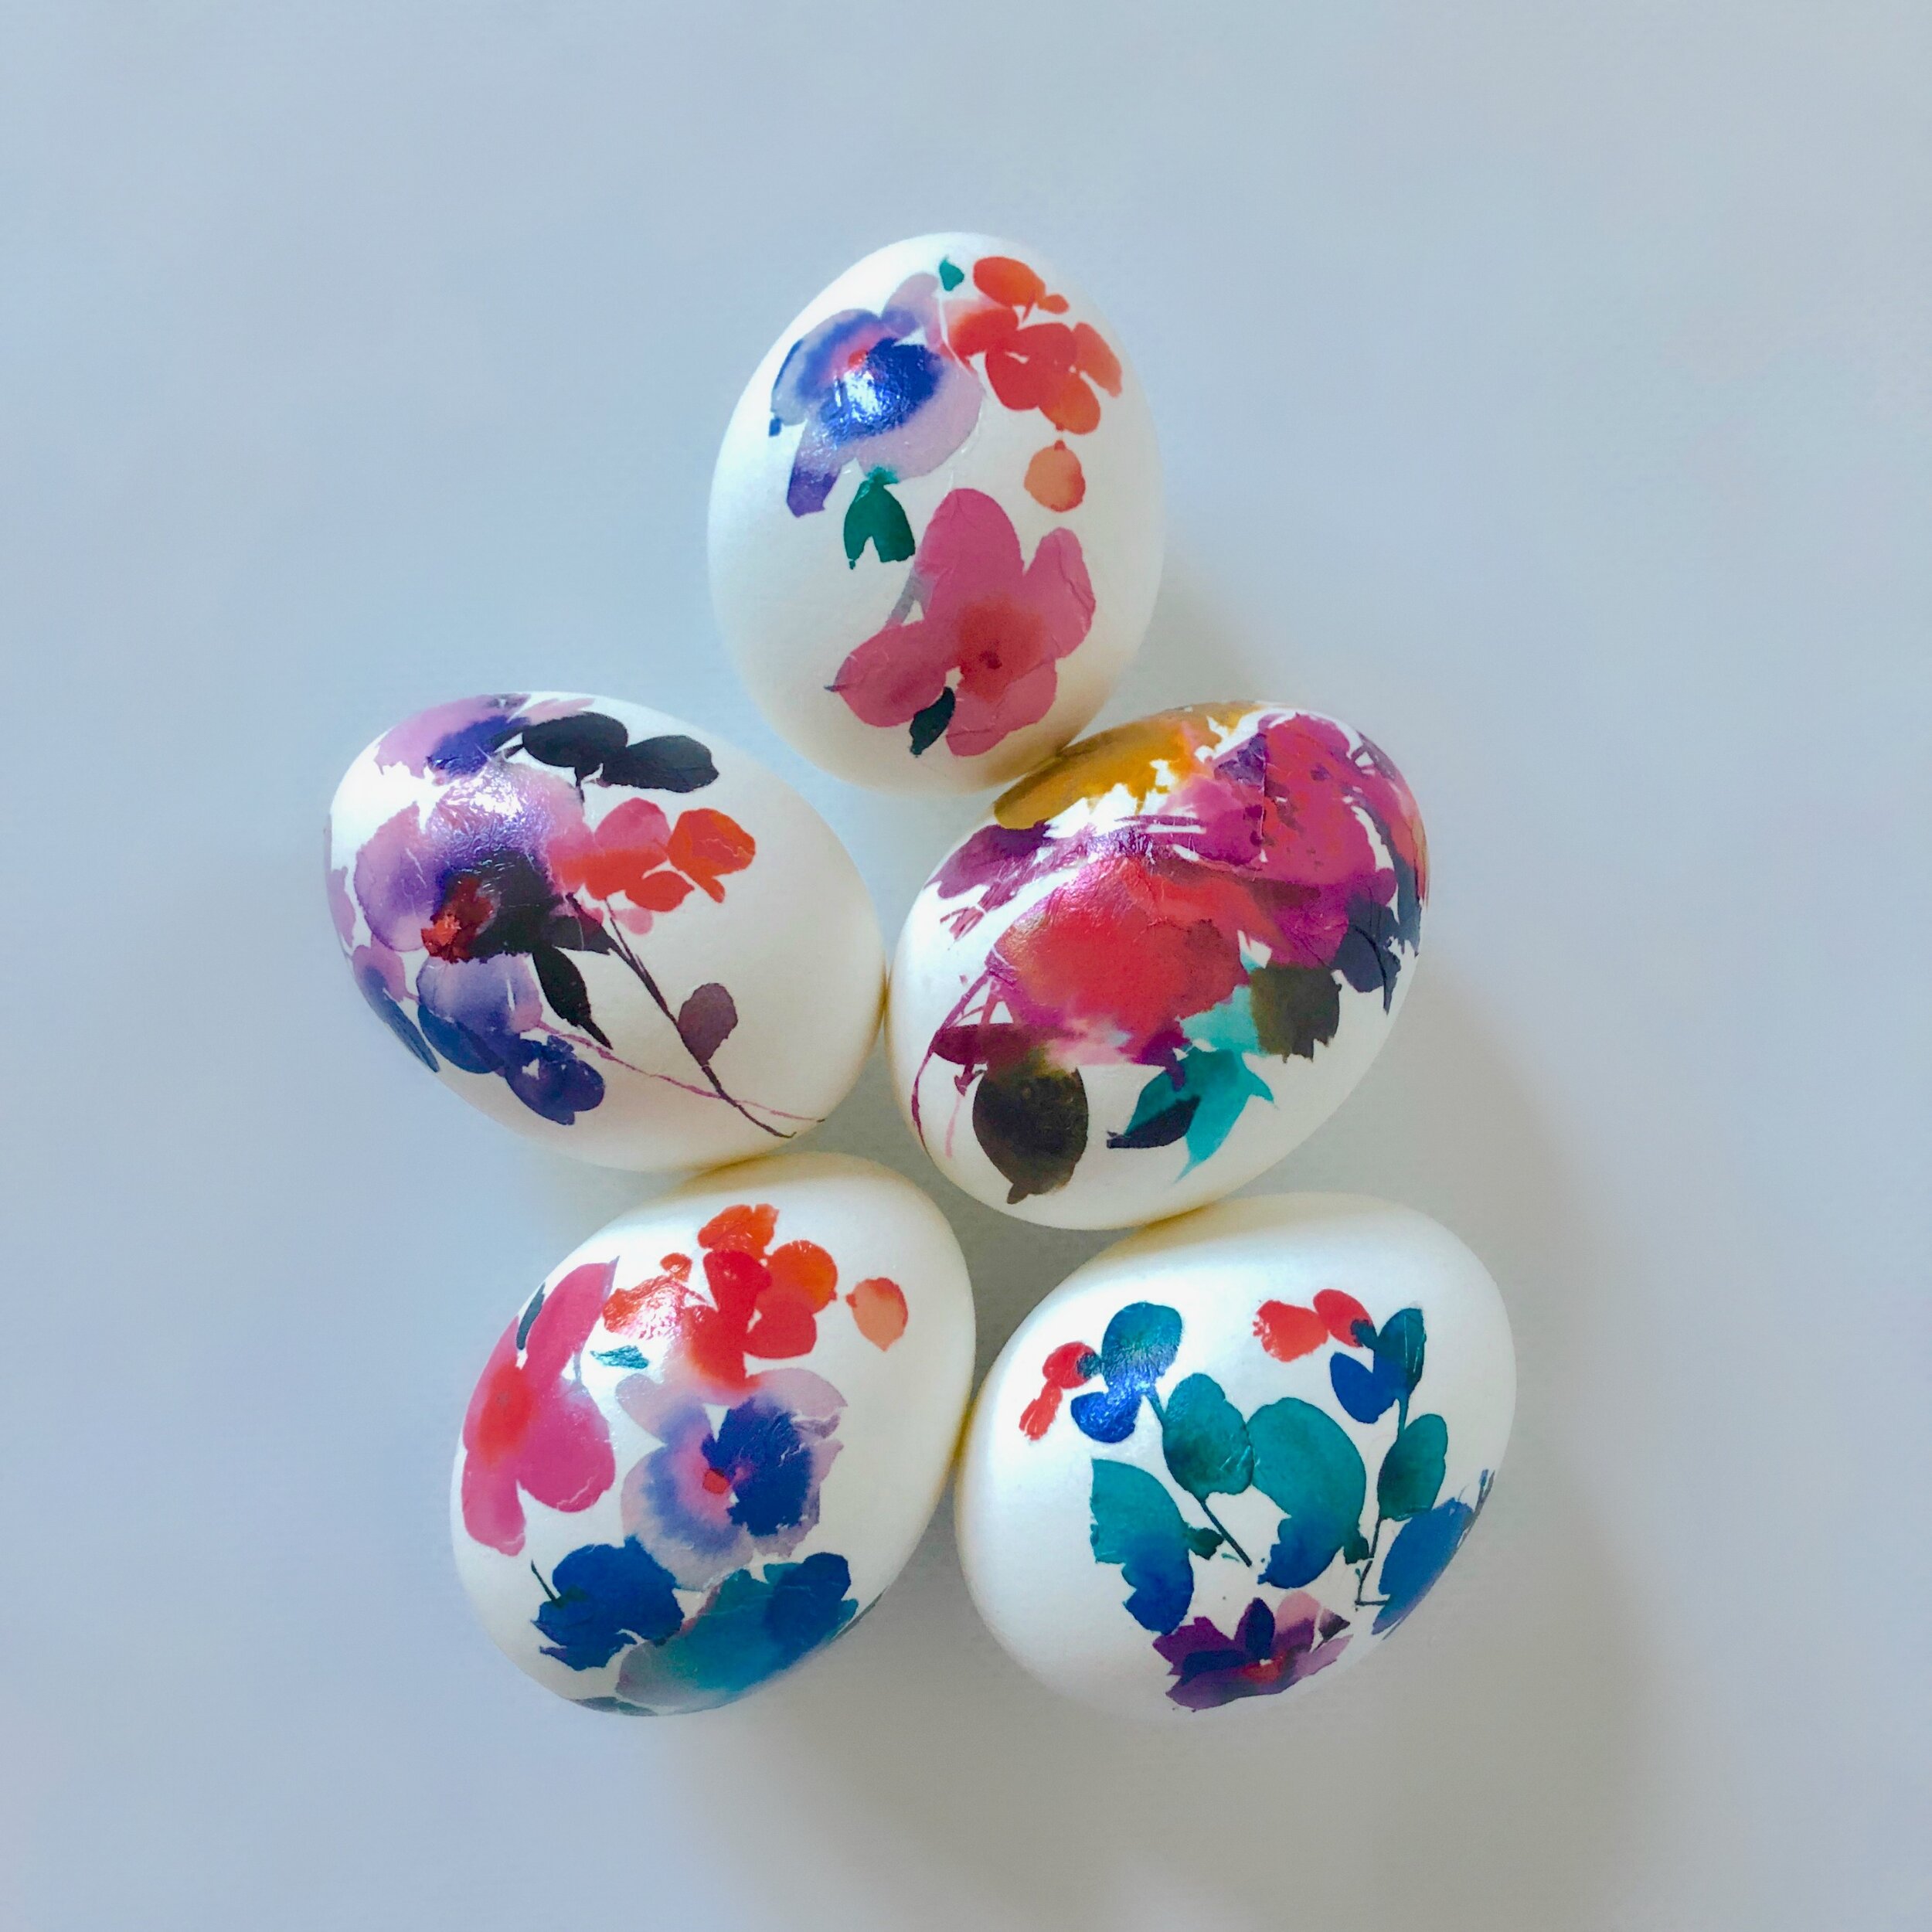
This Easter egg idea came to me last year right in the middle of the chaos of coloring Easter eggs with my two little boys. I was trying to keep the kitchen counter clean (I had lined it with brown paper bags to keep the color off the counters) and caught myself thinking that these eggs are such a pretty, crisp white and are the perfect canvas for adding pops of color to. Plus it would be so much easier than using all these colors with a 3 year old and a 5 year old, praying they don’t spill everywhere! The idea came to me: why not try using colorful and fun temporary tattoos on the backdrop of the white egg and see if it works?
Well, it totally works! Decorating Easter eggs with temporary tattoos is so super easy and they came out beautiful, even on my first attempt. The egg images you see here documented my very first try and I did it with my curious 3-year-old and 5-year-old by my side! The key to the temporary tattoo technique is to cut up the design (if the design allows and is larger in scale) and do it in steps, layering the image together matching up the cut up parts on the egg. Using this technique would also work with brown eggs — you could find cute color coordinating tattoos that would work for the brown egg canvas. Sounds so super fun! The Easter egg ideas are endless for using this temporary tattoo technique, it’s making me excited for this year to try out some new tattoos! Stay tuned!
Learn this fun Easter egg decorating idea using temporary tattoos and get the DIY below!


The how to: Easter Egg Ideas Decorating With temporary Tattoos
Materials:
Hard boiled white eggs
Quality temporary tattoos of your choice. I used watercolor floral tattoos from the In Bloom Floral Party Packet from the shop, which worked like a dream!
Scissors
Sponge
Bowl of water
Hand towel
Basket, bowl or egg holder to hold your eggs
Instructions:
Gather your supplies and if you’re using a tattoo design that is larger in scale like I did for the watercolor floral tattoos and the design is forgiving (meaning you won’t be able to tell that the design was cut up and added in stages) start by cutting up the tattoo. Look for parts of the tattoo that will lay nicely on the round egg shape; not all temporary tattoo designs may work for the shape of an egg. Smaller tattoos will work great and won’t require cutting up the design and adding the tattoos in stages. If the design is larger make sure to remember how the design matched up, so you can add the design back onto the egg in stages. Surprisingly, the watercolor tattoo I used was very forgiving, it did not need to match up perfectly to look good, yay! I think the tattoo being a watercolor design lent itself perfectly to the egg shape and didn’t require a perfect fit!
Cut up your sponge into smaller pieces, which makes it easier to get closer and be more precise when pressing the sponge over the tattoo onto the egg. Then fill your bowl with water.
Dip your mini sponge in the water and grab your first tattoo or piece of the tattoo design, look at the egg as a whole and see how much space you will need for the whole tattoo design. Line up the piece of tattoo you have and place it on the part of the egg, taking in consideration the other parts of the design, so the entire design will all fit together once finished. Remove the plastic top sheet from the tattoo and place the tattoo paper design side down onto the egg, holding tightly, and grab the wet mini sponge placing it on the back of the tattoo, making sure the sponge has saturated all parts of the tattoo. Hold for 30 seconds. Don’t rush this part!
Gently peel off the paper backing and you’ll see the tattoo design has adhered to the egg. Yay!
Use the towel to gently dry off the egg if needed (avoid touching the tattoo design) before placing in your storage container or egg holder, where the egg will dry completely.
Continue with the additional pieces of your tattoo design until the whole tattoo has been placed on the egg. Again, this part doesn’t have to be perfect; just make sure to get the parts close enough and layered next to each other so the design looks like it was done in one stage. You are basically piecing the design together in parts.


Extra details! Ocelo by 3M is the brand of sponge I used, which you can get from Target and the watercolor floral tattoos I used you can find in the party shop. These tattoo party packs come with a sponge, which is so super cool! See all the options for so many Easter egg ideas decorating with temporary tattoos here!


cute Easter egg ideas
Welcome Spring and celebrate Easter with this fun and festive DIY. This may be one of the cutest Easter egg ideas around and it’s so super easy to do. One of the best aspects of it is there is little mess, making it great for life with little ones. Plus, it lends itself to sooo many Easter Egg ideas, the design possibilities are really endless! Pair multiple temporary tattoos together creating a unique design. Arrange your tattooed Easter eggs in a basket for all your friends and family to enjoy as an easy centerpiece around the Easter table!
Leave a comment and let me know what you think of this DIY and if you tried it! What temporary tattoos did you choose and how did it turn out?
Tag me on Instagram so I can be part of your Easter fun! You can find me on Instagram at @sugarmoonbloom.
Happy Spring and Happiest of Easters from my family to yours!

PHOTOGRAPHY BY Sugar Moon Bloom
Don’t forget to Pin your favorite graphic to Pinterest and save it for a fun DIY day!


